Skip to content

Dryer Lint Trap Instructions

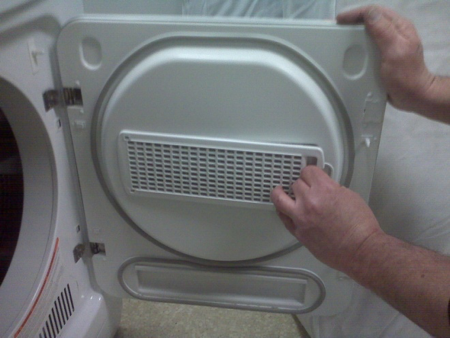
Each Maytag dryer is equipped with a lint trap located in the dryer door. The lint that accumulates in these traps should be removed each time the dryer is operated. Failure to remove the lint reduces the efficiency of the dryer and could present a fire hazard. Depicted below are step by step instructions for the removal, cleaning, and reinstallation of the dryers lint trap.

The lint trap is located within the dryer door. Remove the lint filter by depressing the latch on the right side.

The interior of the door of a Maytag dryer is shown, with a hand depressing the latch for the lint trap. There is a mostly circular indent on the dryer door; halfway down the indent, vertically, the lint trap sits horizontally across most of its width. The latch is in the right side of the lint trap, with a small round opening at the tip in the middle. The latch is accessed by sliding your finger into that opening and gently pushing against the plastic bridge, which will release the lint trap from the door.

Open and clean the lint filter.

The lint trap is shown freed from the door and open, with hands removing the lint from it.

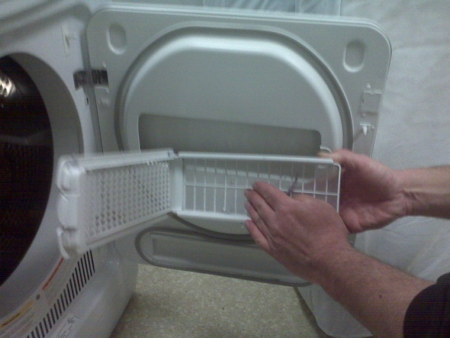
Close and replace the lint filter.

The interior of the door of a Maytag dryer is shown, with a hand depressing the latch for the lint trap. There is a mostly circular indent on the dryer door; halfway down the indent, vertically, the lint trap sits horizontally across most of its width. The latch is in the right side of the lint trap, with a small round opening at the tip in the middle. The latch is accessed by sliding your finger into that opening and gently pushing against the plastic bridge, which will release the lint trap from the door.

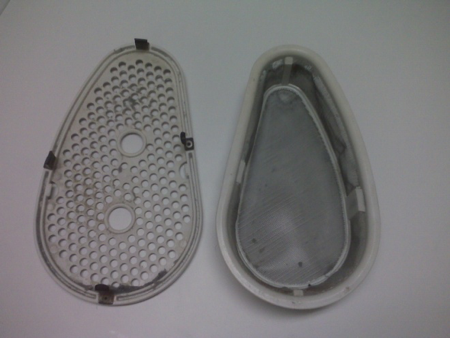
Each Whirlpool dryer is equipped with a lint trap located inside on the rear wall of the dryer. The lint that accumulates in these traps should be removed each time the dryer is operated. Failure to remove the lint reduces the efficiency of the dryer and could present a fire hazard. Depicted below are step by step instructions for the removal, cleaning, and reinstallation of the dryers lint trap.

Step 1: The lint trap is located within the dryer on the back wall.

The inside of a Whirlpool dryer is shown, specifically focusing on the lint filter that's in the back in the upper-right part of the drum.

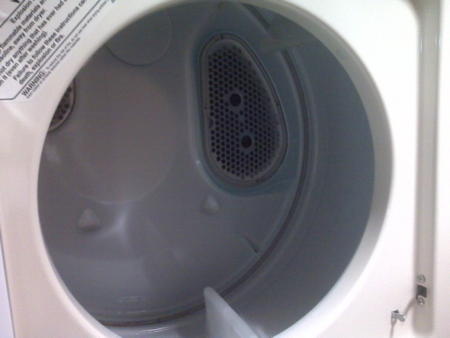
Step 2: Remove the lint filter by placing your fingers in the two holes and pulling.

The interior of a Whirlpool dryer is shown. A hand is reaching in, with the pointer finger and thumb inserted in the holes for the lint trap, which is loosened from its housing but not fully extricated.

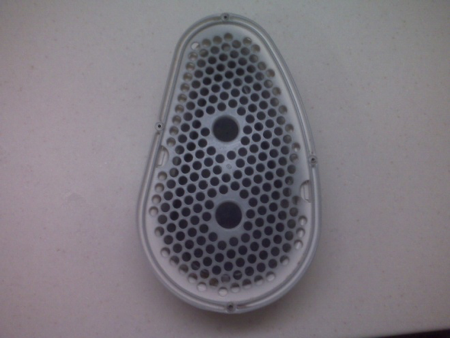
Step 3: Open lint filter
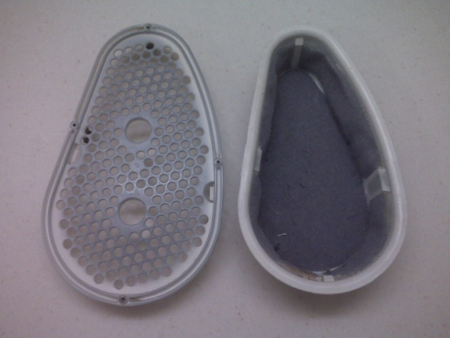
A Whirlpool dryer lint trap sits on a table, opened into two pieces. The cover is on the left side with the catcher, full of lint, on the right.

Step 4: Remove lint

The Whirlpool dryer filter sits open, now devoid of lint.

Step 5: Close lint filter

A Whirlpool dryer lint trap is shown, closed and ready to be placed back in the dryer.

Step 6: Place filter back in the dryer

The inside of a Whirlpool dryer is shown, specifically focusing on the lint filter that's in the back in the upper-right part of the drum.